Friday, November 30, 2018

Caramel Candies for Christmastide

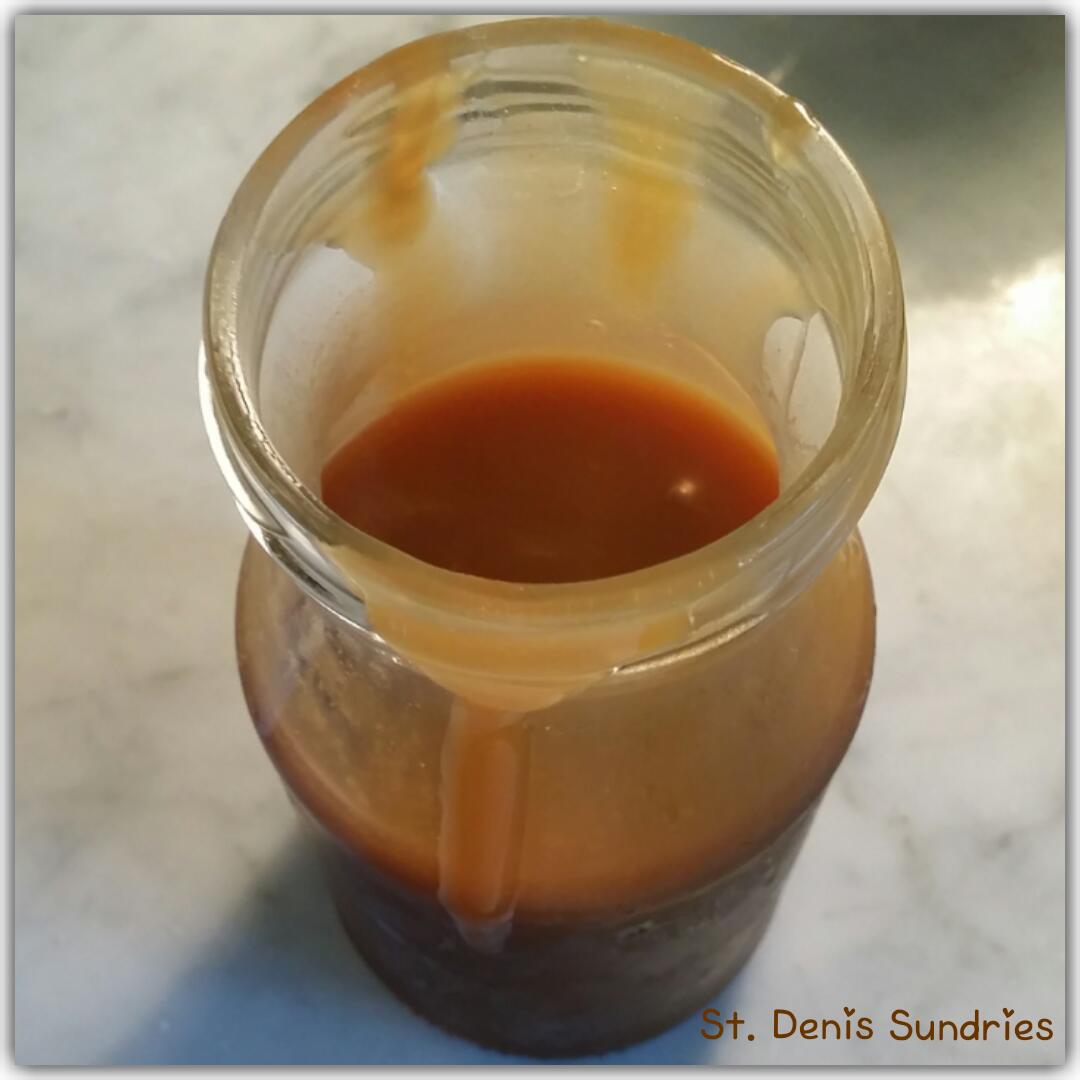
Did I get your interest with the recipe for my caramel sauce? I know I promised you a recipe for caramel candies.

I think these delightful candies will make an appearance in this year’s Christmas cookie tins. Wrapped in brown waxed paper, they keep for about three weeks in a mason jar, they are an old-fashioned favorite. They had their debut at our village’s old-home days’ bake sale and were a hit! Every bag was sold and one lady even asked if I could do a batch for her family’s event.

You’ll remember from the last blog how I love caramel. I like the rich flavor and the buttery-sweetness of it. As a Gilded Age reenactor, I’m interested in the history of these American treats that first showed up in cookbooks and shops in the second half of the 1800s. I read through several recipes for homemade caramels and rejected those calling for evaporated or sweetened and condensed milks. I avoid corn syrups, but when it comes to making candies, I do make an exception. So, I dug in and got cooking on these treats.

These are candy

We don’t keep many sweets in our house–some good quality chocolate bars and Girl Scout cookies are usually all you’ll find. (We have four nieces and they’re all Girl Scouts.  They know who to call during cookie season!) In fact, my general rule is we can have any sweet treat we’d like – as long as I make it. This usually keeps our sugary indulgences to a minimum.

If you’re looking for a “healthy” sweet treat, nope, not this time. Today, it is candy. Which is also nice during Christmastide, when we indulge in sweet treats and special foods, sip warm drinks of cocoa and mulled wine or honey chai teas.  Just remember, a sometimes treat is better enjoyed occasionally than as a regular habit.

Let’s get cooking!

You can make these caramels using a candy thermometer or by dropping a tiny amount of the mix into ice water and noticing how hard the ball of caramel becomes. You are going to cook the caramel to the firm ball stage. This cooks your sugar and cream syrup to an 87 percent sugar concentration. When you drizzle a little bit of the caramel into ice water, the thin syrup clumps together as a ball and doesn’t dissolve in the water. When you take it out with your fingers, the ball holds it shape but easily flattens when you squish it. In contrast a soft ball won’t hold its shape and will flatten on its own outside of the water and a hard ball won’t flatten at all.

When you use the candy thermometer, you have more precision. Clip the thermometer to the side of your pot and watch the temperature. We want to heat our mix to at least 245 degrees to caramelize the sugars.

Ingredients:

  • 1 ½ cups heavy cream
  • 1 cup blond sugar
  • ½ brown sugar
  • 1/3 cup light corn syrup
  • 1 tsp vanilla extract
  • 1 Tblsp butter, plus butter to grease the pan and to cut the candies

You will need:

  • Heavy bottomed pot (my favorite) and wooden spoon
  • Silicon pastry brush
  • Candy thermometer or glass of ice water
  • 8x8 inch pan, lined with foil
  • Pizza cutter and kitchen scissors
  • Brown waxed paper and scissors or paper cutter

Start by lining your 8x8 inch pan with foil and then greasing it generously with butter. Set aside in a cool spot.

Boiling candies
In your heavy pot—I prefer enameled cast iron—combine the cream, blond and brown sugar, and corn syrup. Set the heat to medium and stir gently as the sugars melt and the syrup forms.

Once everything is dissolved, increase to medium-high or high and bring the mix to a boil. Avoid stirring at this point; instead use your pastry brush dipped in water to careful push the syrup down the sides of the pot if it starts creeping upward. Clip on your candy thermometer at this point, or ready your ice water. If you do use ice water, plan to have several glasses ready because you’ll test your mix more than once until it comes to the firm ball stage.

Continue boiling the candy until you reach 245 degrees. I find this takes about 10 minutes but you may need more or less time. Stay with your candy, though! If it looks like it could boil up faster than your pastry brush can handle, give it a quick stir or two to bring it down.

As the syrup thickens and gets darker start checking your temperature. Test your candy stage by taking a small amount on a metal dinner spoon and dripping it into your ice water. Often, the first attempts will simply dissolve in the water. Wait another 2 or 3 minutes, and repeat. When the candy settles on the bottom and holds its shape, take it out with your fingers. If it flattens out of the water, test again after 2 minutes. If it holds its shape but you can squish it, you’re ready for the next step.

Candy cooling in buttered foil.
If you have the thermometer, keep a careful eye and watch your temperature. Your target is 245-250 degrees. Once you see the red line reach the mark, take the thermometer out of the pot and place on a spoon rest – the candy is hot and will burn you if you touch or taste it at this point.

Remove the pot from the heat and stir into your butter and vanilla. If you want “sea salt” caramels, add 1 tsp of sea salt or pink salt at this point. The mix may react and foam just a little, keep stirring if it does until the caramel settles down.

Pour your lovely caramel into your waiting buttered pan. Cover and let cool overnight.

The next day:

Use a pizza cutter and scissors to
cut into bite-sized pieces
Tear several sheets of brown waxed paper (or plain wax paper or any wax paper you think will be pretty, but not plastic wrap) and cut into roughly 2.5x2.5 inch squares. I often cut a stack of these at a time; you will have about 100 candies to wrap. Snagging a partner, like your favorite uncle, to help out is a good idea, too.

Lift your candies from the pan and place on your wooden cutting board. Peel back the edges of foil and tear them away. Roll your pizza cutter in butter and then cut a strip about ½ inch thick from the side of your candy. Lift and carefully peel the foil from the candy. Stab the butter with the blades of your kitchen scissors and snip the strip every 1 inch or so–you can make your candies bigger or smaller.

Place each candy in the middle of your wax paper squares and fold over the sides. Twist the end so you have a sweet little package.

I keep these candies in a mason jar on the countertop. Even with the butter and cream, these caramels keep well for about 3 weeks but after that they start to get grainy and lose their texture.
Wrap in wax paper to keep
candies fresh for up to three weeks.

Wednesday, November 28, 2018

Sweet Caramel for Late Fall

The air is crisp and the last of this autumn’s leaves have come down in the woods behind our little
village homestead.

Autumn always brings with it nature’s goodies from the harvest—apple cider, bright pumpkins, and traditional treats like cranberries, nuts, and baked pies. As I get cozy for the season, I look forward to caramel as a sauce for dipping my apples or pouring over homemade ice cream and apple pie, and as a candy to share with the nieces and nephews during the holiday season. These candies will likely make an appearance in this Christmas’ cookie tins!

I make both confections using half-and-half or cream, butter and blond sugar. I add a little bit of brown sugar to the caramel sauce, which helps to make a deeper flavor and darker color. I added a little bit of homemade vanilla extract and sometimes a dash of “sea” salt.

A Victorian treat

We’re not quite sure when caramel sauce or candy first appeared on the scene, but it seems to be an American invention. Families were making hard candies over their fires before the American Revolution, combining expensive refined sugar with local water that had been steeped in herbs, such as peppermint or horehound. Sometime between 1800-1850 a talented cook combined this cooked water-sugar mix with butter and cream, setting off a tantalizing chemical reaction. The sugars react with the milk and the fats in the butter and cream keep the sugars soft and stretching, rather than turning into a hard, rock candy.

By the 1880s, candy makers had introduced this treat to the public and a few became household names: Hershey, Goetze, and Brocks all started making caramels and continue through today.

Caramel sauce

This caramel sauce is a tried-and-true one that I have been making for a couple of years. I took it to my brother’s house recently to be drizzled over some fresh apple pie. The nephews loved it! We even caught the oldest niece attempting to secretly spoon some directly from the jar to her mouth.

It’s good with freshly sliced apples or used a dip with crunchy pretzels. It melts nicely in coffee, but you will have a buttery film on the top of your drink. You can also drizzle it hot or cold over ice cream or blend into a milkshake.

Ingredients:


  • 1 ½ cups of blond sugar
  • 1-2 Tblsp brown sugar (to your taste, I’ve done both)
  • ¼ cup water
  • ½ cup butter, cut into teaspoon-sized pieces
  • ¾ cup half-and-half
  • ¼ tsp vanilla extract


Get it out of the way first—make sure your butter is cut into little pieces. It will make the blending much easier!

Use a heavy-bottomed pot with lots of room for expansion. I use a 2.5 quart enameled cast-iron pot (like this one). I like how the cast iron helps the sugar to melt and holds its heat as I’m working.

Combine the sugars and the water and put the heat on medium, stirring occasionally until the sugars are melted. Once melted, turn to medium high (but not on high!) and stop stirring. If the sugar starts to climb up the sides of your pot, use a silicon pastry brush dipped in water to gently brush the crystals back down into the liquid. Keep a watchful eye and let it cook for about 10 minutes – a minute or two longer will give you a deeper caramel color and a little ricked or a flavor. But, too much more and you can scorch the sugar.

Boiling sugars.
Add your cut up butter at this point and whisk vigorously. It will bubble and foam, so whisk that down. Once the butter is combined into the sugar, heat for 3 more minutes, whisking as needed.

Turn the heat down to medium or medium low and add the half-and-half all at once. Keep whisking until combined and heat for another 2-3 minutes, whisking as needed. Watch carefully to prevent scorching.

Add your vanilla at this point and remove from the heat. If you want salted caramel, now is the time to add a ½ teaspoon of sea salt or pink salt. While hot, the sauce is thin but will set up and thicken as it cools.

This caramel sauce will keep in your icebox or refrigerator for about two weeks. I did once have a small layer of syrup separate from the sauce on the bottom of the jar after a day or two but found that could easily be stirred back into the sauce.

Like this? There's more: caramel candies!

Wednesday, January 17, 2018

January is for Cozy Teddy Bears

It’s a cold mid-January on our little village homestead in Maryland this year. Christmastide has come and gone and the skies either refuse to snow or tease us with bright but cold days.   

While we might be daydreaming about this year’s coming garden (I have an herb garden to reestablish!), your favorite uncle and I have been cozy with other projects. He’s busy designing board games while I have been working on my sewing. And this winter, two new stuffed bears joined my sewn collection, Beach Bear and Patches Bear.

Last winter I experimented with a teddy bear pattern from 50 Fabric Animals: Fun sewing projects for you and your home. It’s a sweet little book from Marie Claire Ideas and features a nice variety of stuffed toys, decorations and applique projects to try. Some of the patterns are already full-sized but most are meant to be enlarged on a photocopier before use. (As a side note, I got to know a very nice gentleman who works at the local office supply store who helped me with some enlarging.) While it can be frustrating to have to enlarge a pattern before use, it definitely gives a nice option for making patterns at different sizes for some of the projects.


Winter is a nice time to be cozy and very little sewing is cozier than making teddy bears. I adore the Linen Teddy pattern and found that it’s a good project for a variety of fabrics. If you have the patience, you could size this teddy up or down, either making a nice big bear or a little teddy bear prop for photography. Just keep in mind, since he is thread and button jointed, he might not make a good bear for a child, especially one who might try to swallow the buttons.

Since we’re interested in recycling and upcycling here at St. Denis Sundries, this teddy bear pattern fit nicely with the materials I have on hand. My first teddy, Blue Bear, is made from some gingham a friend gave me and the soft denim from an old pair of my nephew’s jeans. Beach Bear is a true Parrothead, made from one of your favorite uncle’s worn-out Hawaiian shirts. Patches Bear seems to have a little bit of special treatment, since I picked up his fabric a year ago with the idea in mind that it would be fun for a stuffed toy.

The directions in 50 Fabric Animals are a little bit vague, so if you are interested in trying a new teddy bear pattern, I’ll walk you through his construction. He will take about a day to sew up or several evenings during the week, but he’s good company while working!

For your pattern

50 Fabric Animals: Fun sewing projects for you and your home. Here’s where to get a copy on Amazon (this is an affiliate link!) I encourage you to purchase a copy of the book for this pattern. The directions below are based on my experience with the pattern in this book.

Another source for a very similar pattern is The Butterfly Balcony. Wendy has a teddy bear pattern you can also try out; I encourage you to read her blog while you’re there!


What you need for your teddy:

  • ¼ yard of fabric for the body of the bear
  • Fat quarter or scraps of fabric in a contrasting color for the bear’s hands, feet and ears. Or get fancy and use more than one color or pattern for his accents
  • 2 smooth black buttons for his eyes
  • 4 buttons to help attach his arms and legs. These could be matching buttons or contrasting ones, depending on how you want him to look when your finished
  • Matching thread for sewing
  • Embroidery thread for his nose and mouth
  • Heavy quilting or upholstery thread for joining his arms and legs to his body
  • Stuffing for toys
  • Ribbon or a strip of fabric for his bow. My three bears all have ribbon bows

Tools:

  • Sewing machine
  • Hand-sewing needles: a between for stitching, an embroidery needle and a darning needle (make sure it fits through the button holes)
  • A chopstick or something similar to help you turn the points and to stuff your little guy
  • Template plastic for your pattern
  • Pencil, pen or chalk for marking your fabric
  • Copier
  • Scissors for cutting plastic and scissors for cutting fabric. These are not the same pair of scissors!

After enlarging the pattern in the book to full-size (there are directions on how to do this at the front of the book), trace the pattern on your template plastic and cut out your templates. Then trace the pattern from the templates on to your fabric. Don’t cut on your traced lines! Using your fabric scissors cut ¼ inch away from the lines to give yourself a seam allowance. This also allows you to pin and sew directly on the traced lines.

Spread out your fabric for your bear’s body, paws and ears. Iron first if you need to knock out some wrinkles (I usually have to do this). On the fabric for his body, trace and cut 1 forward and 1
Beach Bear's cut out pieces
reversed:

  • Front piece
  • Back piece
  • Arm
  • Inside arm
  • Leg
  • Sides of his head

Additionally, trace and cut:
  • 1 center of head piece. Cut the narrow end of this pattern longer than what you have traced, adding about ½ inch. The pattern piece from the book seems to be too short when you’re sewing up the head.
  • 2 ear pieces
From your accent fabric, trace and cut 1 forward and 1 reversed:
  • Palm
  • Sole of his foot
Additionally, trace and cut:
  • 2 ear pieces
Remember, we’re tracing and cutting 2 pieces, forward and reverse because our bear has mirroring sides and limbs. (Kind of like you, my friend.)

The directions in the book to assemble this cute guy are pretty simple, which had me puzzling over them for a while. A few more directions would have been helpful! A diagram, even. Here is my take on them, to be used after reading the ones in the book you bought.

Sew your bear

Start with his tummy. Join the center front from the point on his tush to the edge of the curve at his
neck. Then sew his center back, from the point of the tush about 1/3 of the way up. Back stitch (you’ll be glad you!) and clip your thread. Skip about 1/3 of the length and start your stitch again, using a back stitch at the beginning and then sew to the curve of his neck again.

Take the two pieces of your body and pin together. You’ll have a little bag, so be careful when sewing, you will need to move his body out of the way of your needle when you move from one side to the next. You’ll close up the neck at the circles and end of with a little body that has three points, looking like two shoulders and a color. Turn right-side out and set aside.

Beach Bear's right leg
On to arms and legs! First piece the palms to the inside arms. Then match the palms for the inside arm to the outside arm. Again, the pattern pieces don’t exactly line up, so I match them at the tips of the palms and sew on the outside arm’s tracing line. Leave a gap on the underside of the arm, back-stitching again on the stop and start points. Trim away excess fabric and turn right-side out.

Oh my, his big feet! I am not sure if I enlarged things properly or it is an error in the pattern, but that cute sole is just a little too big for his foot! Start with the legs, pinning the tracing lines with the right sides and sewing from his toe towards the back of the leg. Stop just over the curve of the leg, leave a gap, and start sewing just above the heel, again using a back stitch at the stop and start points.

His sole has a slight curve for the instep of the foot. That curve will tell you if the completed foot is for the right or left side; the two insteps should face each other when you bear is seated. Starting at his toe, pin the sole to the foot but only half way. Gently fold a small bit of the heel and then continuing pinning the entire sole to the foot. Your teddy with have a little crease of fabric his heel.

Do you need to do this? Not necessarily. You can careful adjust your cut fabric to fit the foot. I haven’t and my guys don’t seem too badly off for it.

Once his sole is pinned in place, go ahead and sewing together. When done, turn the right sides out.

For a nice break, let’s do up his little ears. Pin the right sides of the body fabric and the accent fabric and stitch around the curve of the ear, leaving the straight edge open. Turn right sides out and either finger press or iron his ears flat at the seams.

The side of Beach Bear's head
We need to talk about his head, Fred. Start pinning the center of his head at the middle of his nose
and the top of one of his side head pieces. Stitch together. Pin the other side of his head to the center and pin the side head pieces on his chin together. Stitch together and turn the right sides out.

If you are using safety eyes and nose, now is the time to attach them. If you are making this for a child, you will likely want to use the safety eyes and nose, along with joints to join the arms and legs to the body. How to do this is a tutorial for another day.

Getting stuffed

Okay, time to stuff all the parts. Use a polyfill designed for toys. I have used stiff quilt batting for one of the bear’s head and find it help with the shape, but it’s not necessary. Stuff the body and limbs so they have a nice shape but are a little bit squishy. Using a hidden stitch or an overstitch, close up the gaps. Stuff the head and gently shape, but don’t close up the bottom of his head.

Patches Bear before assembly
Once your bear’s head is stuffed and shaped, sew on his button eyes. Then, using two strands of embroidery floss that coordinates with your fabric, stitch a nose on your teddy. I like to use a straight stitch starting from the center seam under his nose and stitching out in a ‘V’ shape until I have a nose. Then use a straight stitch down from the center of his nose, about a half an inch or a little more – your preference. Then add two little stitches from the end to on either side to finish his mouth.

Putting him together

Let’s start at the top. Baste the raw edges of his ears inwards and pin to the sides of his head. Using
an applique stitch, sew the ears on and then remove the basting stitches.

Baste the raw edges of the bears head to the inside. Pin the edges to the top of the body, tucking his little shoulders in. Pin as flat as you can and use an applique stitch to attach his head. Once secure, remove the basting stitches.

Patches Bear's button shoulder
I start with his legs when attaching the limbs. Thread a darning needle with quilting or upholstery thread and knot the end. Sink the knot through the side seam of the body and bring the thread out the other side where you want to attach his leg. Sew through the top-center of his leg and through the button. Go back through the button and through his body to the opposite side. Repeat the steps with his other leg. Gently tighten the thread, squishing his legs and body just a little. Sew through the body, legs and buttons at least twice more, making sure you have the tightness you want. Tie off the thread under one of the buttons.

Repeat the process with his arms, just down from the shoulders. Finish up by wrapping a ribbon or a bright strip of fabric as bow around his neck, covering where the head joins the body.

Look, a teddy!

Isn’t your teddy sweet? Maybe he needs a friend…or two? I have to admit I’m on a teddy bear kick. The weathercaster is calling for a storm tomorrow. Perfect time to get cozy while sewing up teddy bears.